Wednesday, June 17, 2009

Pelicans anyone?

Sheri asked for a page layout for next weeks Art bar and this is what I came up with. I wanted to teach everyone how to dress up a simple cricut title cut and personalize it and make it pop.


For the title I cut out the word beach and it had a Pelican attached to it. If you use the layers function and cut the Pelican parts in the same size you can add the details in with markers and cream metallic chalks. I simple black brad becomes the eye and adds definition. I cut all the layers out of the same "pebble" colored Bazzill cardstock but after chalking they look very different.


I needed to flip this shape to have him look into the layout and then flip the layers too. Same principles to add the details. The wing definition is a cut I used a black marker on to make dark. If I had been smart I would have used the Cricut markers before I made my cuts but I didn't, so I did it after, freehand.


I think it turned out cute and so simple. If you've enjoyed this post and would like to make this project for free, visit the Scrapbook Zone on Tuesday June 23. The Art Bar is open from 2-4 and 6-8.

Tuesday, June 16, 2009

PROGRESS

What a busy 2 weeks we've had. We got all the drywall installed and Matt "the drywall guy" did our mudding and taping. Yeah, he finished on Saturday so we started painting on Sunday. Thank god my parents decided to stay an extra day. With their help we got two coats of primer on the walls and ceiling.


Look at what a beautiful wall we have. Love the look of unpainted drywall.


My father is so proud of his carpentry skills. He built this wonderful fireplace surround with me designing on the fly. And sometimes the vision wasn't conveyed well so we struggled trying to get the image out of my head and built. I wanted inset glass tiles and found this tan-brown pattern at Home Depot. With a little dark tan grout we ended up with a fantastic "Bling" look on the front.


When one needs weight to hold down the glued panels you use what you have, bowling balls. They worked great. It's a good look isn't it?


And today the first coat of paint went on the walls. This was the first wall done, 2 1/2 hours later I finished. Whew...what a day. The only good thing is my arms are getting one heck of a workout lately.


Tomorrow I'll show you the finished (prepainted) fireplace and the walls all done. Now I have to order the carpet. Sorry Rob but it may cost a few dollars.

Monday, June 8, 2009

Walk in My Garden

We have been playing with the Walk in My Garden cartridge at the Scrapbook Zone. What a fun cartridge! I showed you the chip board book a couple weeks age and now I can show you 2 layouts. This is the first one:


It was totally created with the cartridge. The details are so important and they were added in with ink and a black pen. This LO will be used as one of our projects in the new "Explore the Bug Zone" class.

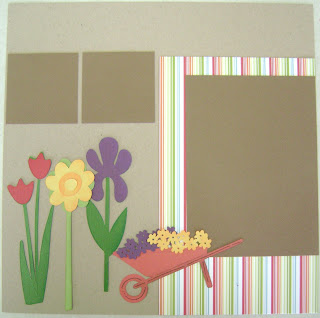
The next one is a 2 page spread for our weekly "Pages 2 Go" kit. I had a lot of fun with this one. I just started cutting the flowers out and inking them. Laid them out on the page, looked at Katie and said now what? She smiled and found this wonderful pattern paper by Senic Route. Yep we needed this and now the photo mats. Two 4x6 and 4 3x3's.


The left side of this layout holds one vertical 4x6 and 2 3x3 photos. The little wheelbarrow was inked and detailed with a black pen. The flowers filling the wheelbarrow make the layout stand out.


On the right side we again have a 4x6 photo and 2 3x3's. The title looked really flat until we inked it. Katie had the brilliant idea of the extra big & sign. The Walk in my Garden cartridge does not have a font so we used Alphalicious and design studio to create the title.


I am so pleased with how these Layouts turned out. I can't wait to show people all the fun things this cartridge will do. Do you want to come Exploring with us in the Bug Zone?

Saturday, June 6, 2009

The work crew multiplies...

Well Friday may have been my birthday but there was work to be done and breakfast to be had. We started our day off eating at Leon's. Good omlettes! Rob took the day off so we could get a jump on hanging dry wall. Debbie played hokey and went in late so she could join us. She's always entertaining, her Kaiti stories are good right now as Kaiti is 6 months into being a teenager.

Then the supervisor was waiting for us slackers at home and we began the "hanging of the ceiling". OH what fun. My parents arrived on Tuesday and they are ever so helpful. Ya just gotta love Virgil and Patsy.


Virgil was busy running electrical, cable and phone lines for us. Thank god my Dad's an electrician. He saves us time and money. I did feel bad about leaving a mess in Marybeth's room. It sucks to be the cellar dweller when they are taking apart your ceiling to drill holes and forget to clean up the mess. So sorry MaryB.


Let me just tell you all right now, rent the drywall lift when doing ceilings. It saved us so much neck ache and sore shoulders. Up it went pretty quickly too. Measure, cut, spread glue, lift, fit into place and screw. That simple.


On Saturday we started hanging the walls. Our buddy Erol stopped in to lend a hand, and some muscles for holding drywall in place. And up went some walls. We moved right along even though our supervisor was laying down on the job.


We took a break mid afternoon to watch Brendan's baseball game, (they won 13-3) and while we were gone Patsy and Virgil hung the corner sheet of drywall. They just can't take a break.


We have some wall work to finish on Sunday. Hopefully the drywall guy comes by to say when he can mud and tape. I can't wait. I'm ready to paint and install carpet. But first things first, finish hanging drywall. Ugh one more day.

Tuesday, June 2, 2009

Demo done...

I'd like you all to see our supervisor. He's doing a "bark up" job. Thank god the messy parts over, right? Ohhh I know we have lots to go.


This is our lovely fireplace. I can't wait for it to be gone. It needs a face lift almost as much as Joan Rivers.


Now someone tell me why Rob thinks this projects is going to cost him more every time he turns around? I think we are right on budget. And yes I had planned on ripping out the 15 plus year old carpet right from the beginning. The padding underneath was disintegrating. Time to go! Gone. :)


Full dumpster. I won't tell anyone that Debbie snuck some stuff in there when Dave wasn't looking. That's what he gets for taking a nap on Saturday afternoon. Rumor has it their garage is cleaner.


What lovely hardwood floors we ended up with. Too bad they weren't in better shape, I'd have saved them. No such luck, they will be covered over with new carpet.


OK is anyone placing bets on how long it will take to put it back together? I want in on that pool. I'm hoping for 2-3 weeks. Not 2-3 months. Virgil and Patsy are due in today so that should help. Off to finish cleaning up, and preparing to have visitors for 10 days.